Eating Normal
  • Home
  • Support Us
  • Recipes
  • Restaurant Reviews
  • Writing
  • Green Bay Coffee
  • Cookbook of the Month
  • Archive

Crabby Eggs

7/10/2024

2 Comments

 
The noble canned crab. It comes in many sizes, varieties, and qualities. I’m delighted to get my hands on any kind of lump crab. Sometimes, the best I can do in Green Bay is the Chicken of the Sea 6 oz. can. And that’s Okay! I had a hankering for some of my old favorites from Delaware, and I did my best to recreate them with what I could. 

Crabby Eggs, a deviled egg topped with lump crab and Old Bay, endeared themselves to me from the cold counter of a tiny seafood shack. I haven’t tried to make them since. These treats do not need much in the way of crab, so the can of crab you purchase for this recipe can be used toward another crabby treat at any gathering table. 

What I make to get the best from the rest of this canned crab will be coming soon, but until then, enjoy these crabby eggs. Delmarva natives, am I missing anything? Did your family make crabby eggs?

Written recipe below the break!


​
@eatingnormal Crabby Eggs, a Delmarva spin on the classic deviled eggs recreated to the best of my ability. Delmarva folks, how do you make your crabby eggs? #recipes #deviledeggs #foodtok #cooking #eatingnormal ♬ original sound - EatingNormal

Read More
2 Comments

Gochugaru Devilled Eggs

4/7/2023

0 Comments

 
Picture
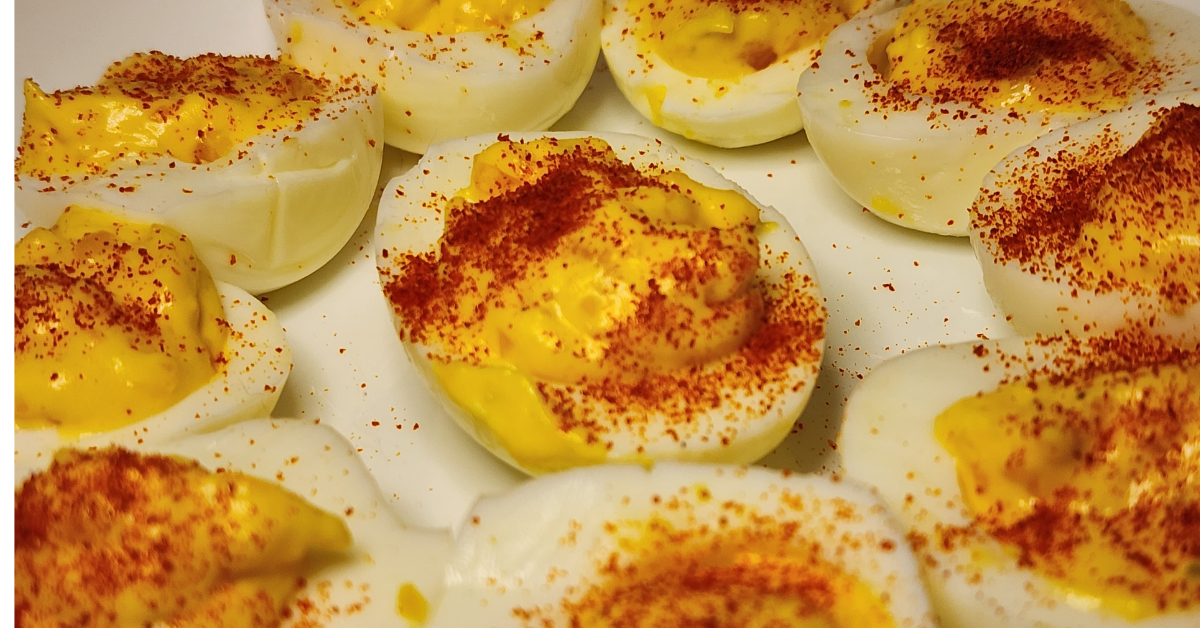
Deviled Eggs are, as far as I’m concerned, the highlight of the appetizer table at any family potluck in the Midwest. I missed them like hell this Thanksgiving and Christmas, so I made my own. This recipe has been made specifically so it can be amped up for the number of eggs you use. The hot sauce fills the role of the vinegar and/or mustard in most classic recipes.

If you are aiming to use this recipe as a base for your own deviled eggs at the holiday table, I follow a standard 1 tablespoon to 1 egg ratio. It SOUNDS excessive, but you'll see.


Read More
0 Comments

Eating Normal Dressing

11/28/2020

0 Comments

 
Picture
This dressing recipe is fairly standard except for the addition of the serrano pepper to add a little bit of kick to the background. Don’t worry about it being too hot! The bread, butter, and other herbs help tone it down, so if you ever pull this one out for another holiday meal, you don’t have to worry about blowing out the taste buds of the kids at the table. I made my own bread because I’m a fancy kid, but you don’t have to do that at all. Going store bought will take some of the pain out.

Ingredients
  • 1 lbs good quality white bread, homemade preferred
  • ¾ cups of butter
  • 1 large yellow onion, chopped
  • 2 celery stocks, finely chopped
  • 1 serrano pepper, finely diced
  • 2 and ½ cups chicken stock
  • ½ cup chopped parsley
  • Rosemary, sage, thyme, chopped together finely, to equal about ¼ cup
  • 2 and ½ cups of chicken stock
  • Salt, pepper
  • 2 large eggs

  1. Preheat your oven to 250 degrees fahrenheit. Tear bread by hand into manageable chunks and spread onto a foil lined baking sheet. Arrange neatly in one layer. Warm in the oven for an hour, removing the pan to stir the bread around occasionally. 
  2. Toward the end of the cooking time, chop your onion, celery, and serrano pepper. Melt your butter into a large saute pan and add your vegetables when it has melted. Cook down for about ten minutes or until the onion is translucent. Chop up your herbs while this process is going on. Stir the veggies when you have the chance.
  3. Add your bread, veggies, and herbs into a large bowl and combine to coat the bread evenly. Then begin to stir in the first 1 and ¼ cups of stock. Allow to cool and for the bread to soak up all that goodness.
  4. When you’re ready to cook, preheat your oven to 350 and prepare a 9x13 baking pan with butter or nonstick spray. Set aside.
  5. Whisk together the remaining chicken stock and two eggs. Pour over your bread and herb mixture and stir to combine before adding into the prepared baking pan. Spread evenly inside the pan.
  6. Bake covered in foil for 40 minutes. You can remove from the oven and keep in the refrigerator for up to a day ahead of the meal at this point, or you can remove the foil and continue cooking for another 40 minutes until the top is golden brown. If you’re cooking it from refrigerator temperature, you may need to extend your second cooking time to about an hour.
0 Comments

    Archives

    April 2025
    March 2025
    February 2025
    January 2025
    December 2024
    October 2024
    September 2024
    August 2024
    July 2024
    June 2024
    May 2024
    April 2024
    February 2024
    November 2023
    October 2023
    August 2023
    July 2023
    May 2023
    April 2023
    March 2023
    February 2023
    November 2022
    October 2022
    July 2022
    May 2022
    April 2022
    January 2022
    November 2021
    May 2021
    February 2021
    January 2021
    November 2020
    August 2020
    July 2020
    June 2020
    May 2020

    Categories

    All
    Appetizers
    Apples
    Baking
    Bread
    Breakfast
    Budget
    Chicken
    Cold Weather Food
    Cookies
    Desserts
    Dips
    Drinks
    Fall
    Football Food
    Gifts
    Holiday Sides
    Jam
    Leftovers
    Lunch
    Market Meals
    Meat
    Mushrooms
    One Pot Meals
    Onion
    Pasta
    Pastry
    Produce
    Quick Meals
    Rice
    Sauces
    Saving Taco Bell
    Savory
    Sides
    Single Serve
    Soup
    Spice Mixes
    Summer
    Thanksgiving
    Thanksgiving Leftovers
    Vegetarian

    RSS Feed

Proudly powered by Weebly
  • Home
  • Support Us
  • Recipes
  • Restaurant Reviews
  • Writing
  • Green Bay Coffee
  • Cookbook of the Month
  • Archive